Showing posts with label Rice. Show all posts

Wednesday, March 27, 2013

One Pot Vegetable Biryani

Its been a long time since I had a post in this space. Hoping addition of a little one to the family is a good enough excuse for the long absence! Its been a roller coaster ride this whole time with 2 kids. I am hoping I could post at much frequent intervals now, provided my laziness would give in :-)

I was thinking as to what my first post should be after this break. Given that getting things done much quicker is a bigger priority for me now, I look for extra quick dishes. This One-pot Vegetable Biryani is one of that kind - flavorful, yummy and quick at the same time. This can be eaten on its own and does not need a side dish, which is an added bonus! Also a good lunch box option for kids.


Serves around 5-7 people
Oil- 2 tbsp
Cardamom- 5
Cinnamon- 2 - 1" pieces
Cloves- 5
Onion- 0.5 lbs (1/2 of an onion - thinly sliced)
Ginger Garlic Paste- 2 tbsp
Tomato- 0.3 lbs (1 tomato chopped)
Turmeric Powder- 1/2 tsp
Chilly Powder- 5 tsp
Coriander Powder- 4 tsp
Garam Masala- 1/2 tsp
Mixed Veggies- 2.25 cup (12oz.)
Paneer- 0.5 lbs (small cube sized pieces)
Water- 5 1/2 cup
Lemon Juice- 1/2 tsp
Ghee- 2.5 tbsp
Basmati Rice- 2.5 cups
Salt- to taste
Cashews- handful
Raisins- handful

  1. Wash and soak the rice as the first step.
  2. Heat oil in a pan and add Cardamom, Cinnamon and Cloves when the oil is hot and saute for a few seconds.
  3. Add onions and saute until they start to turn brown.
  4. Add chopped tomatoes and ginger garlic paste and saute until the tomatoes are mushy.
  5. Add the turmeric powder, chilly powder, coriander powder and garam masala to the onion and saute until the raw smell is gone.
  6. Add the mixed vegetables and saute well with the masala.
  7. Add 1 1/2 cup of water and salt and let it cook for 5-7 minutes, until the vegetables are half done.
  8. Add the cubed paneer to the gravy and give it a stir.
  9. Add remaining water and lemon juice and let the water boil. Adjust the salt to taste.
  10. Drain the rice and add it to the boiling water.
  11. Add the 1 1/2 tbsp of ghee after adding the rice and mix well without breaking the paneer.
  12. Check in between and mix a little to make sure that the rice is not sticking to the bottom.
  13. Once the water is almost gone, turn off the stove and close the pan with a tight lid. Let it sit for 15-20 minutes.
  14. Open the lid and just stir it to make sure that the rice is cooked and the grains are not sticking together.
  15. Fry the cashews and raisins until plump in remaining ghee and add that to the rice for garnish.

It is a complete dish on its own. For an elaborate non-vegetarian meal or for serving to guests, add in dry chicken dish or beef dish which will complete the menu.

Tuesday, October 12, 2010

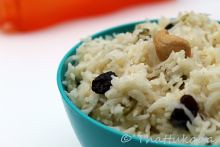
Nei Choru / Ghee Rice

Nei Choru is another one of the traditional Muslim dishes made during special occasions. This was what my mom used to make during most weekends back home. It is a quick and easy dish, but that does not in any way affect its grandeur. It definitely belongs to the group of those royal dishes such as Biryani and Pulao. The flavor of the ghee and the spices makes it all the more regal. The flavor was filling up the place so much, that my son was climbing up on a bar stool to see what was cooking!


Serves 4-5 people
Basmati Rice- 1 1/2 cup
Oil- 1 tbsp
Cinnamon- 1 - 2" stick
Cloves- 3
Cardamom- 3
Onion- 1 small size (around 0.35lb - sliced)
Ginger Garlic Paste- 1 1/2 tbsp
Green Chilly- 1 big (sliced of round)
Water- 3 cups
Ghee- 2 tbsp + 1 tsp
Salt- to taste
Raisins- 1/2 a handful (optional)
Cashew nuts- 1/2 a handful (optional)

1. Soak the rice for around 30 minutes and drain it.
2. Heat oil in a pan and add cinnamon, cloves and cardamom to the oil and saute for a minute. You could use ghee instead of oil as well.
3. Add the Onions and saute until transparent.
4. Add ginger-garlic paste and saute until the raw smell is gone.
5. Add the green chillies and saute for another minute.
6. Add the water and salt and let it boil.
7. Add 2 tablespoons of ghee when the water starts to bubble.
8. Add the drained rice to the boiling water.
9. When the water is almost evaporated, turn off the stove and close the pan with a lid and let it rest for 15-30 minutes.
10. Fry the cashews and raisins in the remaining 1 tsp of ghee until the raisins are plump.
11. Garnish the ghee rice with the fried cashews and raisins. You could also fry some onions and garnish.


This aromatic ghee rice goes well with most all curries, be it Vegetarian or Non-Vegetarian. Bring in a Raita, Pappadam and pickle to the table and you are ready for a perfect feast.

Saturday, July 31, 2010

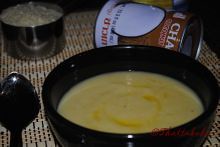
Chukku Kanji / Dry Ginger Porridge

Chukku Kanji is one of the main dishes used for breaking the Ramadan fast back home. This would be the main dish that you would have after breaking the fast, eating dates and drinking a glass of juice (mostly lemon juice at my home). This Kanji is accompanied with Kaya Thoran or Kaya Odachathu (Recipe coming soon!) or Kappa together with Meen Curry. Chukku (Dry Ginger) has a lot of medicinal properties which is supposed to be good for your fasting stomach. A cup of this porridge is the tastiest thing, especially after not eating or drinking anything the whole day from dawn to dusk. It is also good when you have stomach problems and cannot take any solid foods.


Serves 8-10 people
Rice- 1 1/2 cup
Water- 11 1/2 cups
Grated Coconut- 1/2 cup
Cumin Seeds- 1 1/2 tsp 
Dry Ginger (Chukku)- 2 big pieces (0.7 oz)
Salt- to taste 

1. In a pressure cooker, boil the rice with 4 cups of water until 3 whistles. We want the rice to be mashed a little.
2. Grind Coconut with Cumin and 1/4 cup of water to a fine paste.
3. When the pressure is gone, open the cooker and add the remaining water (or as much as you need based on your consistency requirement).
4. Break the dry ginger into smaller pieces and add it to the cooker and stir well.
5. Add the ground coconut paste and salt to the cooker and mix well.
6. Let the mixture come to a boil and turn off the stove.


Chukku Kanji (also known as Nombu Kanji) is worth a try, even when you are not fasting.

This goes to the Iftar Moments event hosted by Ayeesha of Taste of Pearl City.

Sunday, July 25, 2010

Coconut Rice / Thenga Chor

Thenga Chor or Coconut Rice has a lot of variations from region to region. I have seen ones with grated coconut, with coconut milk, ones which are seasoned with mustard, and lots more. The one I have here, I am assuming, is a Southern Tamil Nadu version as my MIL is the one who introduced me to this. This is a highly flavorful rice with the addition of cinnamon and fenugreek. This is one dish that you could make for a special occasion like you make a biryani or ghee rice and serve with a spicy meat curry like Chicken Curry or Mutton Curry, preferably a Nadan (Traditional) style curry or a spicy vegetable curry.


Serves 5-6 people
Refined Oil or Coconut Oil - 2 tbsp
Shallots- 15-20
Green Chilly- 2
Ginger Garlic Paste- 2 tbsp 
Coconut Milk- 1/2 cup (thick)
Water- 3 1/2 cup 
Cinnamon- 2 - 1" piece 
Fenugreek- 1 tsp
Jeera Rice - 2 cups 
Salt- to taste 

1.  Soak the rice in water for 30 minutes. You could also use Basmati rice or Sona Masoori rice.
2. In a mixer grind the shallots and green chilly with very little water into a coarse paste.
3. Heat oil in a pan big enough for making the rice. I used coconut oil to give it that added flavor.
4. Add the shallot-green chilly paste and ginger garlic paste to the oil and saute until the raw smell is gone and the mixture is almost dry. Don't let it brown.
5. Add coconut milk and water to the pan and add salt to taste.
6. Add Cinnamon and fenugreek to the water and let it boil.
7. Add the drained rice to the boiling water.
8. Stir it in between and when the water is almost gone, turn off the stove. Rice may not be completely done at this point, it may be a little over 3/4 done.
9. Close the pan with a tight lid and keep it closed for 30 minutes.
10. After 30 minutes, the rice will be ready to serve with each grain separated out.


The special fragrance and taste that fenugreek adds to the rice is unbelievable considering that it is an ingredient with a slightly bitter taste; rest assured that you will not get any feel of that bitterness in this rice.

Friday, April 16, 2010

Mutton Biryani

I am BACK from my vacation - actually it's been more than a week now. I am saying this out loud, more for myself than my friends out there. Helping myself get back into reality! This is an attempt to get back out of my do-nothing mode.

This vacation was very special to me as it was my lil-sister's marriage. So the 4 weeks back in Kerala flew like 4 days; and not to say that I had such a great time back there with my sweet family. And my son has come back as a spoilt brat with all the pampering.

And to my surprise, when I came back there was a gift waiting for me at Foodie Blogroll. It was a set of 2 books from Kelly Donleaa who blogs at Organizing Dinner -  70 meals, One Trip to the store & Cook Once...Eat Twice! I was so excited to receive the gift especially considering the fact that I am all into collecting cook books now. This was a perfect addition to my collection. Thank you Foodie Blogroll and Kelly!

I have not cooked much since I came back and am still trying to get back to my normal self. I was feeling really bad that I am not giving much attention to my blog and hence decided to see what I have in my drafts and found a perfect one to celebrate my sister's wedding with my blogger friends. So here is a virtual feast for all my friends out there with a Mutton Biryani.


For Mutton Gravy:
Coconut Oil- 3 tbsp
Mutton- 2 lbs
Onion- 2  (Sliced)
Ginger Garlic paste- 3 tbsp
Cardamom- 5
Bay Leaf- 3 -  5 small
Cloves- 5
Cinnamon- 2 - 1" piece
Chilly Powder- 1 tbsp
Coriander Powder- 2 tsp
Turmeric Powder- 1/2 tsp
Garam Masala- 1/2 tsp
Tomato- 1
Coconut Milk- 1 cup (Thick)
Salt- to taste

1. Heat oil in the pressure cooker.
2. Add cardamom, bay leaf, cloves and cinnamon when the oil is hot.
3. Saute for a few seconds and add the onions.
4. When the onions become transparent, add ginger garlic paste and saute until the raw smell is gone.
5. Add the chopped tomatoes and saute for 2 minutes.
6. Add the chilly, coriander and turmeric powder and saute well for a minute.
7. Add the mutton, salt and garam masala and mix well.
8. Close the pressure cooker and let it cook for 3-4 whistles.
9. Once done and the pressure is completely released, open the cooker and add the coconut milk and cook for a few minutes. Make sure there is enough thick gravy to mix with the rice. If not, add additional water and boil again.

For Rice:
Oil- 3 tbsp
Rice- 2 cup
Cumin Seeds- 1/2 tsp 
Salt- to taste
Water- 8 cups

1. Soak the rice in water for 30 minutes and drain it.
2. Heat 8 cups of water in a vessel and add salt to it. It should be slightly on the saltier side.
3. When the water starts to boil, add the cumin seeds.
4. Once water is completely at a boiling stage, add the soaked rice.
5. Pour the oil to this as well. This will help prevent the rice from sticking to each other.
6. Once the rice is 3/4 done, drain the rice and keep aside.

For Garnish:
Ghee- 3 tbsp
Cashews- handful
Raisins- handful

1.  Preheat the oven at 350 degree.
2. In an oven proof dish, mix the 3/4th done rice and the mutton together with the gravy.
3. Also mix 2 tbsp ghee to this.
4. Evenly spread it out on the dish and seal the dish with an aluminium foil.
5. Bake for 25 minutes at 350 degree.
6. In a small frying pan, add 1 tbsp ghee and fry cashews and raisins, until the raisins become plump.
7. Garnish the biryani with the cashews and raisins.


Now let me share the 2 awards that I received from my friends while I was gone.

1.Honest Scrap Award from Beena Shylesh of My Kitchen
2.Sunshine Award from Adukala Vishesham


Thank you friends for considering me to share these awards.

I would like to share these with
1. Kairali Sisters
2. Memory Archived
3. Cooking and Recipes
4.Asra Ashaon Ka
5. Faiza Ali's Kitchen
6. Saju's Kitchen
7. Pan Gravy Kadai Gravy

Thursday, January 28, 2010

Prawn Biryani

I was talking to my sister over the phone last weekend and she was trying to make my mom furious by saying that I have more mention about my MIL in my blog than her. She was specifically referring to my mom's biryani recipe and was asking why I didn't post that yet. All this in front of my mom. My sis was having a good laugh and enjoying the whole scene. I don't think she was able to agitate Mamma (at least I hope so :-) ). Anyways this conversation forced me to make the Biryani following my mom's recipe.  Her recipe is that of a "Pakaa" Biryani. "Pakaa" meaning cooked. So Rice and Chicken are prepared separate and then layered. The other version of Biryani is "Kacha" biryani. "Kacha" meaning uncooked where all the ingredients are cooked together. 


For Rice:

Rice                       - 2 1/2 cups
Oil                          - 2 tbsp
Onion                     - 1/2
Ginger Garlic Paste - 1 tbsp
Salt                        - to taste
Water                    - 5 cups
Ghee                     - 2 tbsp

1. Soak the rice in water for 30 minutes. Basmati rice is commonly used. I used Jeera rice this time for a change.
2. Heat oil in a pan and saute the sliced onions until they turn transparent.
3. Add ginger garlic paste and saute until the raw smell is gone.
4. Add water and enough salt and let it boil.
5. Add soaked and drained rice to the boiling water.
6. Also add the ghee and let the rice cook.

For Prawn Masala:

Oil                          - 21/2 tbsp
Prawn                     - 1 1/2 lb 
Yogurt                   - 3/4 cup
Onion                     - 1 1/2
Ginger Garlic Paste - 2 1/2 tbsp
Green Chilly            - 3
Small Onions           - 10
Turmeric powder      - 1/4 tsp
Chilly powder           - 1 1/2 tbsp
Garam Masala          - 1 tbsp
Salt                         - to taste
Water                      - 3/4 cup

1. Mix the prawns and yogurt with enough salt and keep aside for at least 30 minutes.
2. Heat oil in a pan and saute the sliced onions until they turn transparent.
3. Add ginger garlic paste and saute until the raw smell is gone.
4. Add the slit green chilly and smashed small onions to this and saute for a minute.
5. Add turmeric, chilly powder and garam masala to this and saute for another minute.
6. To this add the prawns, salt and water and let is cook.
7. Once the gravy starts becoming thick, turn off the stove.

To Garnish:

Ghee                        - 1/2 tbsp
Raisins                     - a handful
Cashews                   - a handful

Layering:

1. Make alternate layers of the rice and prawn masala in an oven proof pan.
2. Close it with an aluminium foil and bake in a 300 Degree pre-heated oven for 15 minutes.
3. In a pan, heat ghee and saute the raisins and cashews until raisins becomes plump.
4. Garnish the biryani with the raisins and cashews.


This is a simple and quick recipe for delicious biryani. You could replace the prawns with chicken and make chicken biryani as well.

Thursday, December 24, 2009

Vegetable Pulao

Vegetable Pulao or Pilaf is a rice dish mixed with vegetables and mildly flavored with the spices like Cardamom, Cloves and Cinnamon to give it an aromatic flavor. Here is a little bit on the history of Pulao/Pilaf (Source:Wikipedia):

The English term pilaf is borrowed directly from Turkish, but all these terms ultimately derive from (Classical) Persian پلو , which is pronounced [paˈlau] in Persian (Dari), and in standard Iranian Persian, polów. In Urdu is pronounced pulāo پلاو. Depending on the local cuisine, it may also contain a variety of meat and vegetables. Pilaf and similar dishes are common to Middle Eastern, Central and South Asian, East African, Latin American, and Caribbean cuisines.


The recipe I have here is the Indian version of the Pilaf. I got the basic version of this recipe from one of my friend's mother (Thank you Thankam Aunty!). We had a dinner at their place where aunty made this Pulao and my son could not stop eating it. So I had to get the recipe from her.
 

Basmati Rice            - 2 cups
Onion                       - 1 (medium sized)
Ginger-Garlic Paste   - 1 1/2 tbsp
Tomato                     - 1
Green Chilly              - 2
Cardamom                - 5
Cloves                      - 5
Cinnamon                 - 1.5inch stick 
Oil                            - 5 tbsp
Mixed Vegetables      - 1 1/2 cup (Corn, Green Peas, Corn & Green Beans) 
Coconut Milk            - 1/2 cup
Water                       - 3 3/4 cup
Salt                          - to taste
 
1. Soak the rice in water for 30 minutes
2. I used the frozen mixed vegetables. So I microwaved the vegetables for 5 minutes.
3. Using a mixer, make a fine paste of the tomato and green chilly.  
4. Heat 3 tbsp of oil in a pan in medium heat.
5. Add the spices (Cardamom, Cloves & Cinnamon) to the oil and saute for a minute.
6. Add the Onions and saute until they start turning brown.
7. Add the Ginger-Garlic paste and saute until the raw smell is gone.
8. Add the tomato-green chilly paste and saute for 2 minutes.
9. Add the water and thick coconut milk and mix well.
10. Add enough salt (could be more on the higher side, as the rice and veggies have to cook in this) and let the water boil.
11. Add soaked rice and microwaved vegetables to the boiling water.
12. Add 2 tbsp of oil to the water as well. This will prevent the rice from sticking together.
13. Once the rice is almost cooked and very little water is left, turn off the stove and close the pan with a tight lid.
14. Open the lid after 30 minutes and the Pulao should be ready.


You could garnish with nuts and raisins, if needed. This is a quick and easy recipe, especially if you are using the frozen mixed vegetables.
Related Posts with Thumbnails